Using the Line Graph Tool and Adding Data
(If you want to follow along with this tutorial, download the produce.txt.zip file. Just make sure you unzip it after download.)
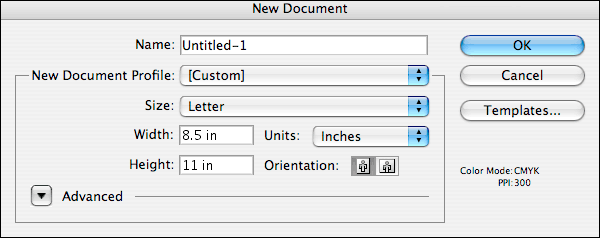
First, create a new letter-sized document by going to the File menu and selecting New:
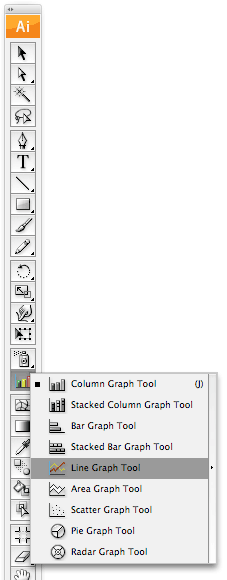
Click on the little triangle on the bottom right corner of the Chart tool on the toolbar to select the type of graph you want to create. Let's start with the Line Graph Tool so scroll down the list and select it:
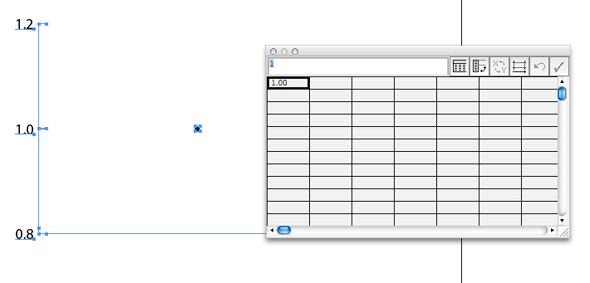
When you move your cursor into the center your document, it will turn into a cross, of sorts. Click and drag it to cover a space that will be roughly about the size of the chart you want to create. The Data Window dialog box will automatically appear, as well as a rough outline of the chart as it looks before any data is entered or imported:
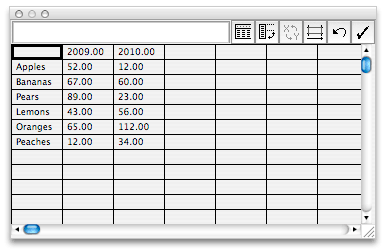
You can enter data manually or import it from Excel, which is what I do. Illustrator will not import Excel (.xls) files so you must first resave your file in Excel as a tab-delimited or comma-delimited text (.txt) file. If you want to follow along using the same data that I used here, just download the Produce.txt.zip file (unzip it after download) by clicking HERE.
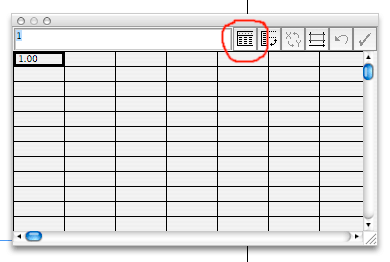
To import the data, click on the Import button (circled in RED). Navigate to the Produce.txt file and click Open:
The data will automatically fill in the cells:
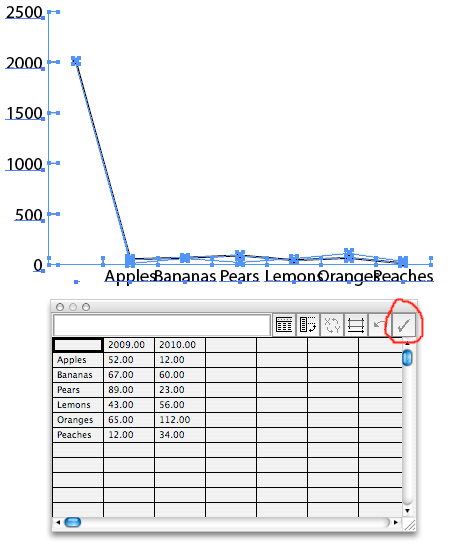
DON'T DO THIS but if you were to click the Apply button (circled in RED) right now, you wouldn't be pleased. This is because Illustrator requires that table headers, what Adobe calls "Labels", such as "Apples, Bananas" in the left column and the years, "2009" and "2010" in the top row be in quotation marks. If not, you get this, yikes:
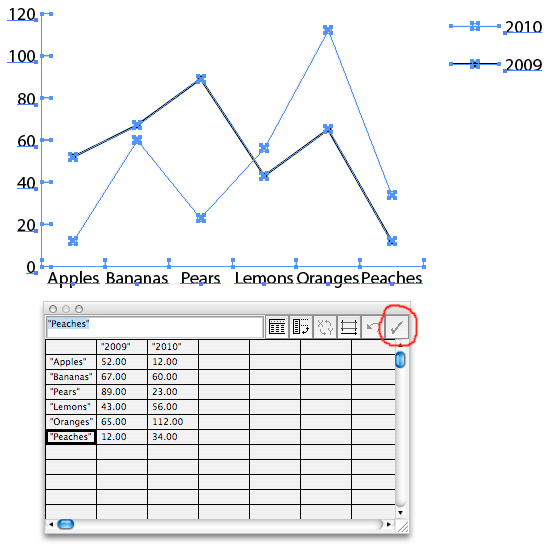
Labels (such as 2009 and 2010 in this case) that appear along the top row of cells will appear in a Legend (covered in Part II), and Labels created in the first column (such as Apples, Bananas, etc) will appear along the bottom horizontal axis. Again, more on this in Part II.
Add quotation marks to your Labels and click on the Apply button (circled in RED). Note, editing text or data in a cell works the same in Illustrator as it does in Excel—click on a cell, edit the text/data in the top-left box and then click RETURN/ENTER or TAB:
| A handy tip if you have long Labels: To create line breaks in labels, use the vertical bar key to separate lines. For example, type "Apples|Gala|Fuji" to produce the following line graph label for "Apples" that is actually three lines long: 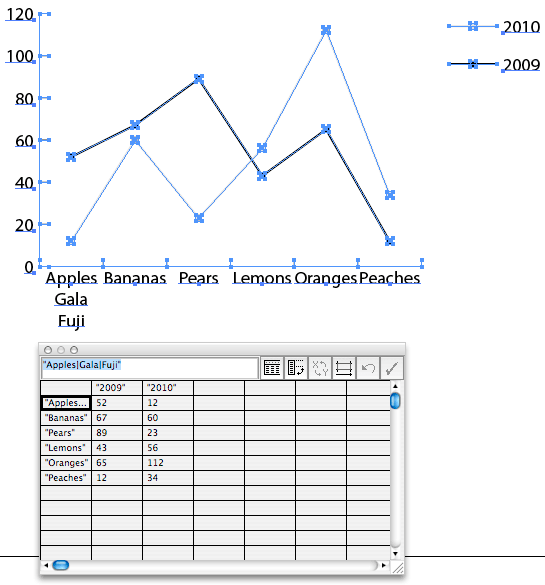
|
Next you'll most likely want to get rid of the ".00" (Illustrator's 2 decimal default value) in your data. To do this, click on a data cell and then click on the Cell Style button (circled in RED). In the Cell Style dialog box, change the number of decimals to 0:
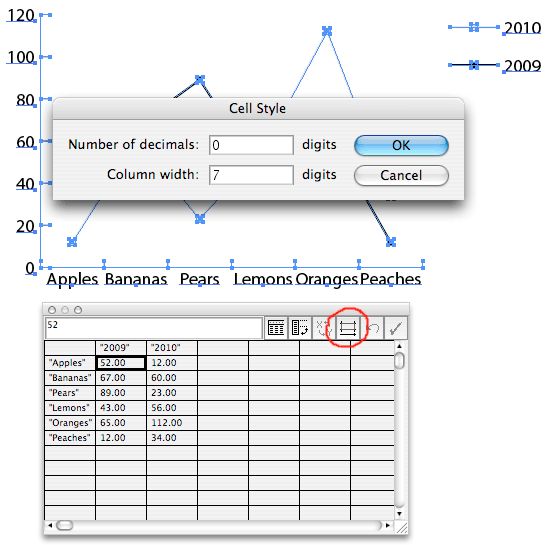
I always leave Column width to whatever Illustrator has it set to. According to Adobe: "Adjusting the column width has no effect on the width of columns in the graph; it only lets you view more or fewer digits in a column." So, for instance, if you changed the word, "Oranges" to "Tangerines", change the Column width to "10" if you want the entire word, "Tangerines" to appear in your Data Window dialog box. If you don't it will look like this (but really, no biggie, if it does):

Click OK in the Cell Style dialog box and the decimals disappear. Next click the Apply button (circled in RED):
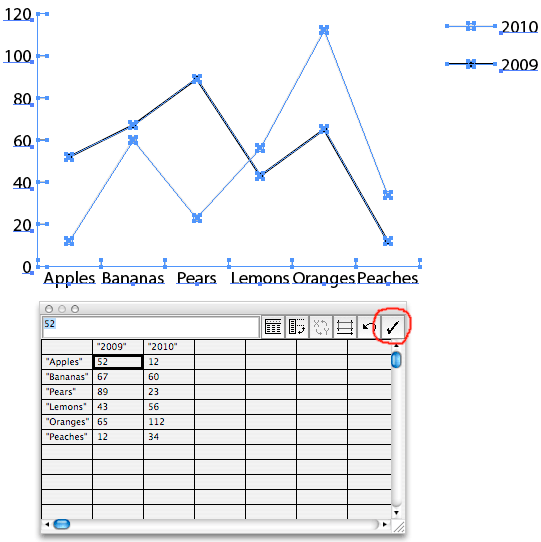
When you are done entering and editing your data, click the red button on the upper left corner of the Data Window dialog box (circled in RED) and the Data Window dialog box will disappear:
Click anywhere off the chart and you can get a better idea of how your chart looks so far:
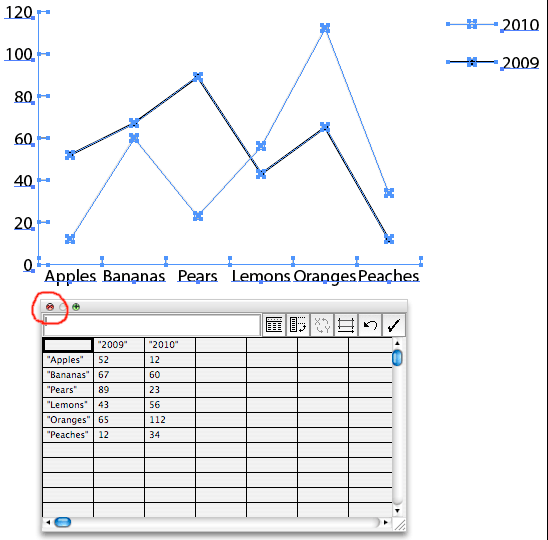
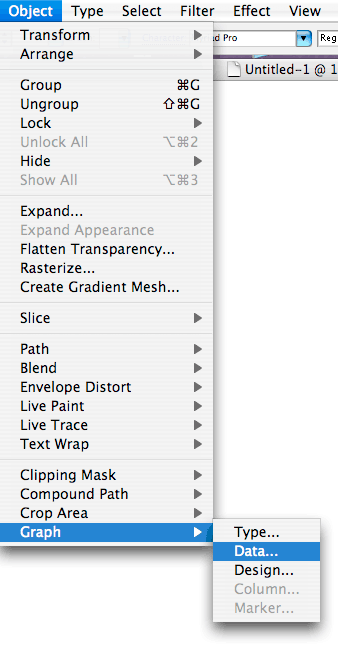
If you ever want to bring up the Data Window dialog box again to add or edit your data, select your graph by clicking on it with the Selection tool, go to the Object menu, scroll down to Graph and in the drop-down menu that appears, select Data...:
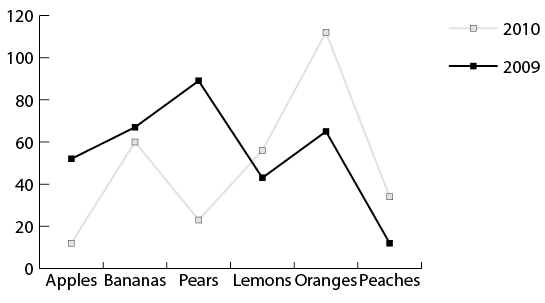
Next, we want to begin to format our chart using the Type Window dialog box:
GRAPH TOOLS, Part II: Formatting Your Value and Category Axis