Although Photoshop has a Sharpen tool in the tools palette and a Sharpen command under the Filter menu, you’re better off using the Unsharp Mask filter to sharpen blurry images. The Sharpen tool and Sharpen command work by increasing contrast, which can have a negative effect on your image—especially when dealing with old photographs—and may emphasize existing moiré patterns. Unsharp Mask, on the other hand, is much more versatile because it allows you to sharpen with more precision.
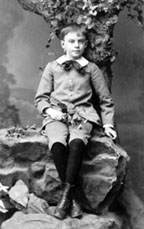
Before Unsharp Mask:
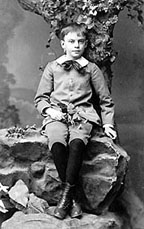
After Unsharp Mask:
Under the Filter menu, scroll down to Sharpen and in the pop-up window that appears, select Unsharp Mask:
This will bring up the Unsharp Mask dialog box:
Make sure the Preview box is checked so you can view the changes to your image as you make the. When you move the cursor over the image thumbnail, it becomes a hand and you can move the thumbnail around. By clicking on the + (plus) or - (minus) box you can make the thumbnail appear larger or smaller.
Unsharp Mask works better than other sharpening tools because it allows you to select a sharpening Amount, Radius and Threshold value:
Amount: Drag the slider or enter a value (from 1 to 500) to specify how much of the sharpening effect you want applied to the image. The Amount value you set is pretty flexible but try to keep it below 300. If you feel the need to set it higher, this probably means that your Radius value is too low.
Radius: Drag the slider or enter a value (from .1 to 250) to specify the thickness of the sharpened edge. Do you want to sharpen just the edge or the edge and some surrounding pixels as well? Basically, Unsharp Mask works by placing a halo along the edges of your image that creates the appearance of increased contrast (i.e. sharpness). Low Radius values sharpen only the pixels close to the edges and create a small halo, whereas higher Radius values sharpen a wider band along the edges, and as such, create a large halo and more sharpening. High Radius values can also cause over-sharpening, so watch it.
So how do you know what to set the Radius value at? In most cases, it can be determined by your resolution. For Web graphics at 72 dpi, don’t set a Radius above .5. If your image is still not sharp enough for you, increase the Amount. For 300 dpi graphics, set a Radius value of about 1.5 to 2.
A general rule of thumb is: RADIUS = DPI DIVIDED BY 150.
Threshold: Drag the slider or enter a value (from 0 to 255) to specify how Photoshop will recognize image edges. Higher values tell Photoshop to recognize a thicker edge and less edge sharpening occurs. I usually keep this setting at 0 because it seems to me, that if you have to set a Threshold value of anything but 0, it probably means your Radius value is too high. However, Threshold is handy when it comes to flesh tones. Most of the time, when you scan old black & white photos in, you get banding and mottled flesh tone. Increasing the Threshold helps somewhat.
Most people find it easier to sharpen repeatedly a little at a time (by initially setting low Unsharp Mask values). Once you apply Unsharp Mask, you can easily reapply those settings by hitting Command F (Mac) or Control F (Windows).